Thursday, April 5, 2012

Create RESTful WCF Service API: Step By Step Guide


Introduction

Windows Communication Foundation (WCF) is an SDK for developing and deploying services on Windows. WCF provides a runtime environment for your services, enabling you to expose CLR types as services, and to consume other services as CLR types. In this article, I am going to explain how to implement restful service API using WCF 4.0 . The Created API returns XML and JSON data using WCF attributes.

What is REST?

Based on the Roy Fielding theory "Representational State Transfer (REST), attempts to codify the architectural style and design constraints that make the Web what it is. REST emphasizes things like separation of concerns and layers, statelessness, and caching, which are common in many distributed architectures because of the benefits they provide. These benefits include interoperability, independent evolution, interception, improved scalability, efficiency, and overall performance."
Actually only the difference is how clients access our service. Normally, a WCF service will use SOAP, but if you build a REST service, clients will be accessing your service with a different architectural style (calls, serialization like JSON, etc.).
REST uses some common HTTP methods to insert/delete/update/retrieve information which is below:
  1. GET - Requests a specific representation of a resource
  2. PUT - Creates or updates a resource with the supplied representation
  3. DELETE - Deletes the specified resource
  4. POST - Submits data to be processed by the identified resource

Why and Where to Use REST?

Few days back, I was writing a service which was supposed to be accessed by heterogeneous language/platform/system. It can be used by iPhone, Android, Windows Mobile, .NET web application, JAVA or PHP. Using web service, it was bit complex for me to expose it to everyone using uniform system. Then we decided to use REST, which was easily espoused over cloud. This was a great example which shows the capability of SIMPLE RESTful SERVICE :). Below are some points which will help you to understand why to use the RESTful services.
  1. Less overhead (no SOAP envelope to wrap every call in)
  2. Less duplication (HTTP already represents operations like DELETEPUTGET, etc. that have to otherwise be represented in a SOAP envelope).
  3. More standardized - HTTP operations are well understood and operate consistently. Some SOAP implementations can get finicky.
  4. More human readable and testable (harder to test SOAP with just a browser).
  5. Don't need to use XML (well, you kind of don't have to for SOAP either but it hardly makes sense since you're already doing parsing of the envelope).
  6. Libraries have made SOAP (kind of) easy. But you are abstracting away a lot of redundancy underneath as I have noted. Yes, in theory, SOAP can go over other transports so as to avoid riding atop a layer doing similar things, but in reality just about all SOAP work you'll ever do is over HTTP.

Step by Step Guide

Generally, a developer is scared to use WCF because of a lot of confusing configuration. I will try to use minimum configuration so that it will be easier to understand for us. We will develop Restful WCS API in 6 steps. So let’s start now.

STEP 1

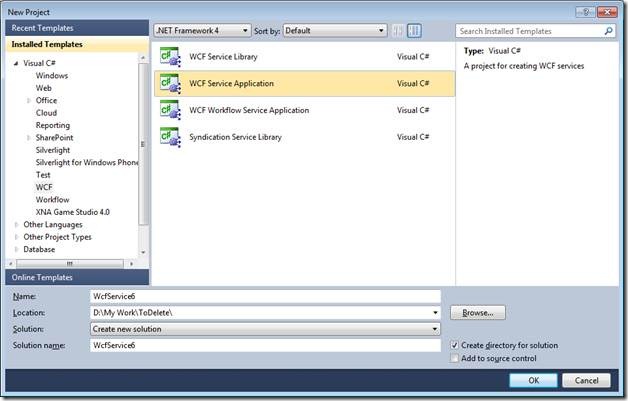
First of all launch Visual Studio 2010. Click FILE->NEW->PROJECT. Create new "WCF Service Application".

STEP 2

Once you create the project, you can see in solution that By Default WCF service and interface file are already created. Delete By default created file as we will create our own interface and WCF service file.

STEP 3

Now right click on solution and create one new WCF service file. I have given name to the service file as “RestServiceImpl.svc”.

STEP 4

As I explained at the start of the article that we will be writing an API which can return data in XML and JSON format, here is the interface for that. In IRestServiceImpl, add the following code:
In the above code, you can see two different methods of IRestService which are XMLData and JSONData.XMLData returns result in XML whereas JSONData in JSON.

STEP 5

Open the file RestServiceImpl.svc.cs and write the following code over there:

STEP 6

Now let’s move to configuration part which is the last one. There will be two basic parts of the configurations file which we must have to understand.
<services> 
This part contains information about the End Point. Below are the code details.
Click to enlarge image
<behaviors>
This part contains details about service and endpoint behavior.
And that’s it. Our Restful WCF service is ready for test purposes.

Service Ready to Test Now

Now I launch the application in the browser to see the result. I launch this service in Internet Explorer and my URL is now http://localhost:35798/RestServiceImpl.svc. Now if I use http://localhost:35798/RestServiceImpl.svc/xml/123URL, I get the following response on the browser which is an XML format and that was my task to achieve.
Now if I use http://localhost:35798/RestServiceImpl.svc/json/123 URL, I get the following response on the browser which is an XML format and that was my task to achieve.
Hope the article is useful for the community. Comments, suggestions and criticisms are all welcome.

Hosting WCF Service on IIS7


Walkthrough on creating WCF 4.0 Service and Hosting in IIS 7.5

Objective
This article will give step by step walkthrough
1. How to create a basic WCF 4.0 Service?
2. How to host WCF Service in IIS 7.5?
3. Hot to test service in a client.
Create WCF Service
Create WCF service. Open visual studio select new project and then from WCF tab select WCF Service application to create a new WCF service.
clip_image002
Delete the default code created by WCF from IService1 and Service1.svc.cs
a. So delete the data contract
b. Modify the service contract as below. Just make one operation contract to return a string .
IService1.cs
using System;
using System.Collections.Generic;
using System.Linq;
using System.Runtime.Serialization;
using System.ServiceModel;
using System.ServiceModel.Web;
using System.Text;
namespace WcfService5
{
    [ServiceContract]
    public interface IService1
    {
        [OperationContract]
        string GetMessage();
 
    }   
}
 
Service1.svc.cs
using System;
using System.Collections.Generic;
using System.Linq;
using System.Runtime.Serialization;
using System.ServiceModel;
using System.ServiceModel.Web;
using System.Text;
 
namespace WcfService5
{
    public class Service1 : IService1
    {
        public string GetMessage()
        {
            return "Hello From WCF Service "; 
        }
    }
}
 
Leave the default configuration created by WCF.
Web.Config
<?xml version="1.0"?>
<configuration>
  <system.web>
    <compilation debug="true" targetFramework="4.0" />
  </system.web>
  <system.serviceModel>
    <behaviors>
      <serviceBehaviors>
        <behavior>         
          <serviceMetadata httpGetEnabled="true"/>         
          <serviceDebug includeExceptionDetailInFaults="false"/>
        </behavior>
      </serviceBehaviors>
    </behaviors>
    <serviceHostingEnvironment multipleSiteBindingsEnabled="true" />
  </system.serviceModel>
 <system.webServer>
    <modules runAllManagedModulesForAllRequests="true"/>
  </system.webServer
</configuration>
 
Host WCF Service in IIS 4.0
Open IIS
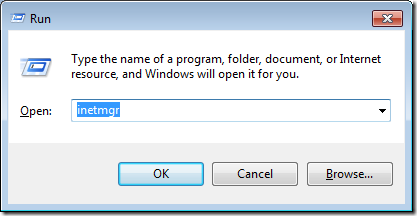
a. Open the command prompt in administrator mode. To do click on Start button then type RUN in search and then in Run window type inetmgr to open IIS .
clip_image003
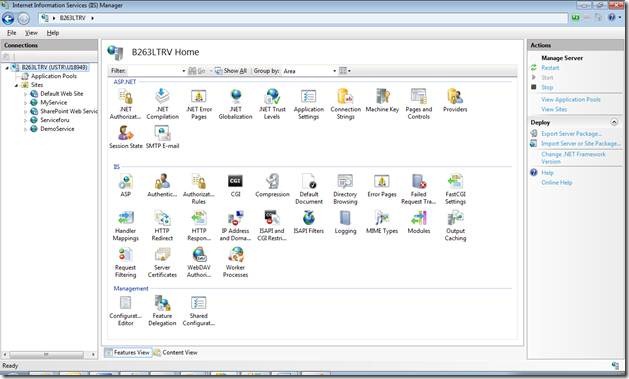
Now you will have IIS open like below
clip_image005
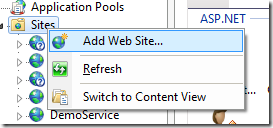
b. Right click on Sites and then click Add Web Site
clip_image006
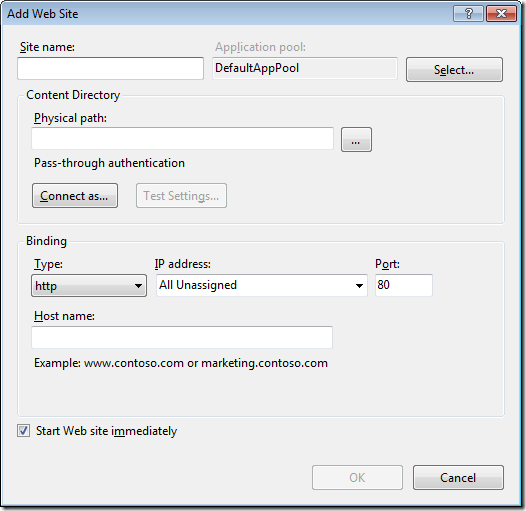
c. Now a window will open.
clip_image007
Give any name of your choice as the site name. I am giving name here HostedWcfService
clip_image008
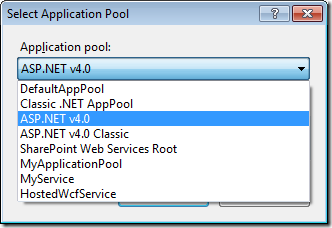
Now click on select and choose ASP.Net v4.0 from the drop down.
clip_image009
Now in the physical path section, we need to give physical path of the service. So to get the physical path of the service, right click on the WCF Service project in visual studio and click open project in windows explorer. Open the project in windows explorer and from address bar copy the path and paste that below. Or you can browse also. Just click on browse button and navigate to project folder of the WCF Service.
clip_image010
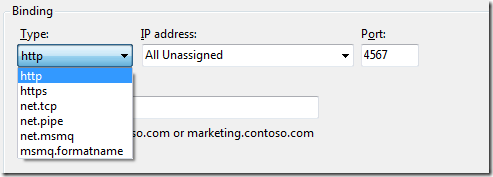
Now at the Binding section select HTTP. Give any port number. I am selecting the port as 4567
clip_image011
Do not give any name as host name. Leave it blank
clip_image012
Check the check box Start Web Site Immediately.
clip_image013
And now click OK on the window.
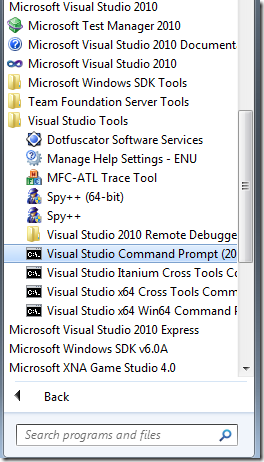
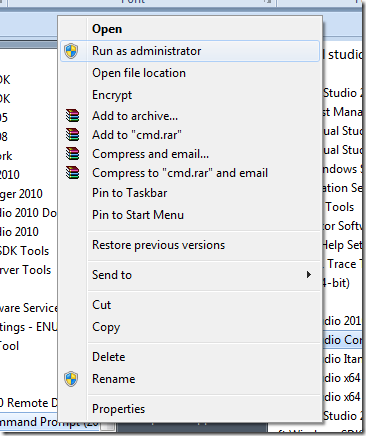
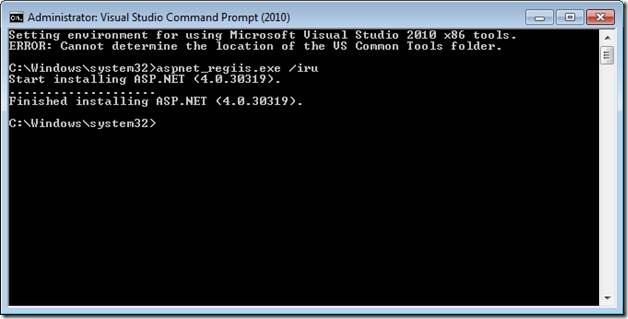
d. Now open visual studio command prompt in administrator mode. Right click and select as administrator
clip_image014
clip_image015
Type the below command
aspnet_regiis.exe /iru
clip_image017
You will get the message Finished Installing ASP.Net 4.0
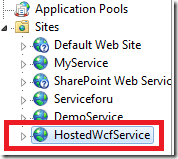
e. Now go to inetmgr, you would able to see the site you just created in previous step.
clip_image018
Publishing the WCF Service
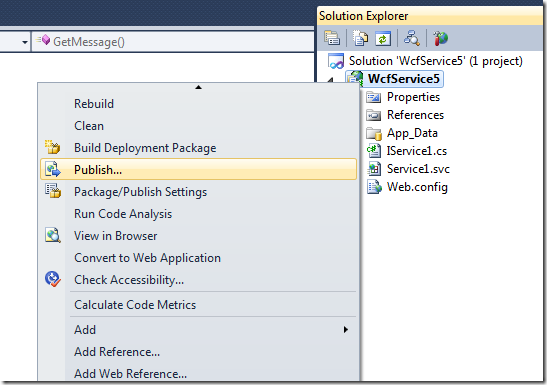
Go back to WCF Service. Right click and select Publish
clip_image019
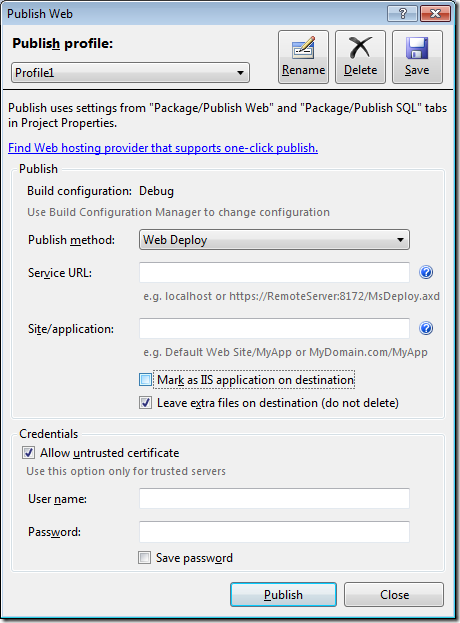
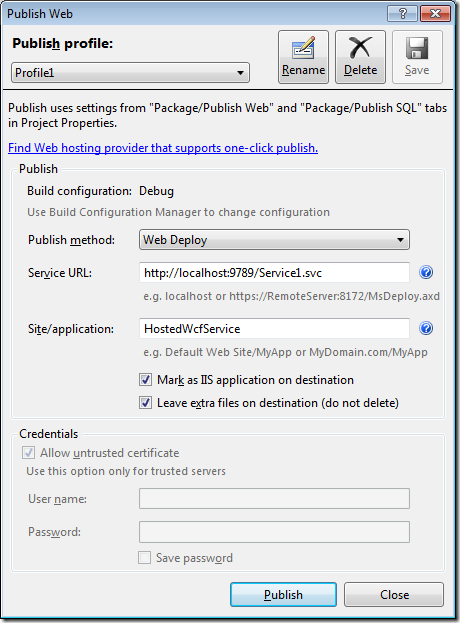
On clicking of publish a window will come.
clip_image020
Give a Service URL. You are free to give any Service URL here. Just make sure host name is geeting resolved. In stead of localhost you can give IP address or your machine name also.
clip_image021
Give the name of the site HostedWcfService. We created this site in previous step.
clip_image022
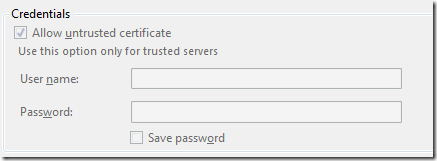
Leave the credential inactive.
clip_image023
Now click on Publish.
clip_image024
You will get the message in bottom publish succeeded
Browsing the service hosted in IIS
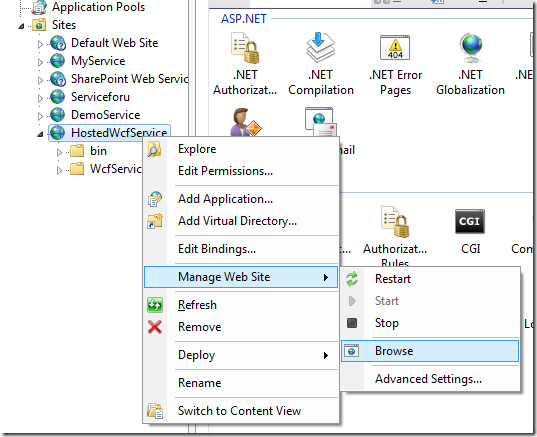
Open Inetmgr and right click on site HostedWcfService. Then from Manage Web Site select Browse option.
clip_image025
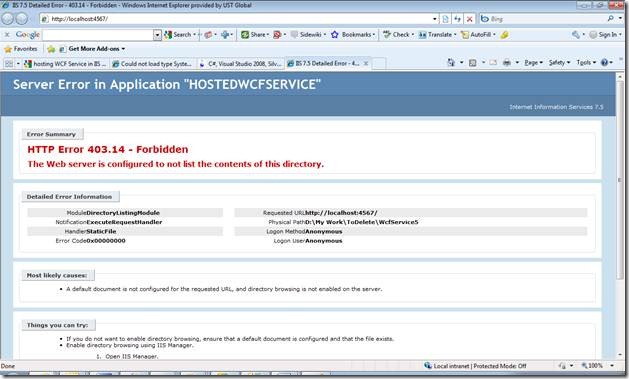
When you click on browse site will get open in browser
clip_image027
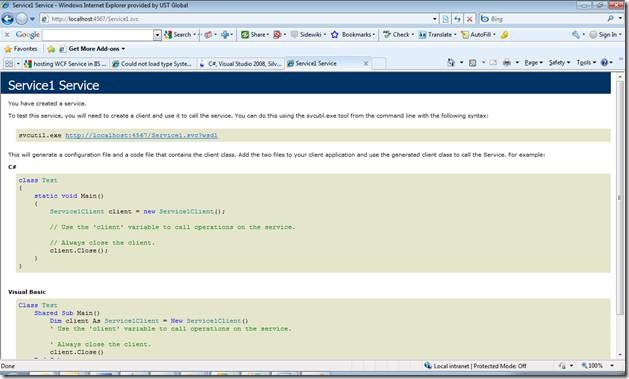
You will get the above error. Just in address bar append Service1.svc with the address to open the service in browser.
And in browser you will get the service up and running.
clip_image029
So now you successfully created and hosted the WCF 4.0 service in IIS 7.5
Testing the Service at client
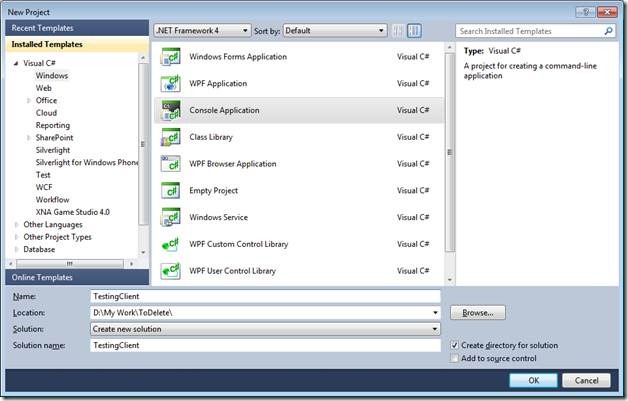
a. Create console application project.
clip_image031
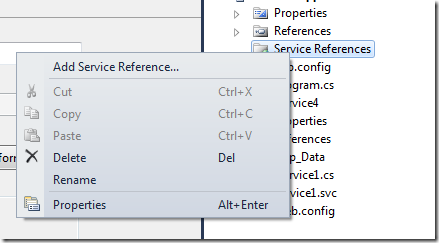
b. Right click and add the service reference.
clip_image032
c. Give in address the address of service hosted in IIS and click GO.
clip_image033
d. Call the service as below ,
Program.cs
using System;
using System.Collections.Generic;
using System.Linq;
using System.Text;
using ConsoleApplication1.ServiceReference1;
 
namespace ConsoleApplication1
{
    class Program
    {
        static void Main(string[] args)
        {
            Service1Client proxy = new Service1Client();
            Console.WriteLine(proxy.GetMessage());
            Console.Read();
        }
    }
}
 
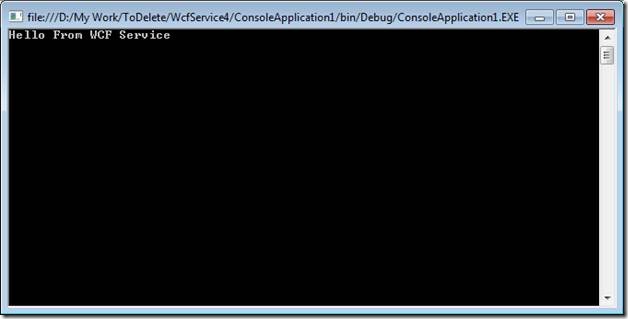
Output
clip_image035
Conclusion
In this article we saw,
How to create a basic WCF 4.0 Service?
How to host WCF Service in IIS 7.5?
Hot to test service in a client.
I hope this article was useful. Thanks for reading. Happy coding.